

DISCLAIMER #1: Code presented here is pseudocode that does NOT necessarily reflect production Limit Theory code.
DISCLAIMER #2: This tutorial assumes you have at least basic knowledge of 3D geometry and related math.
Firstly, let me complain that ‘greeble’ is an abhorrent word and should be banished.
Ok, now that’s off my chest… 😂
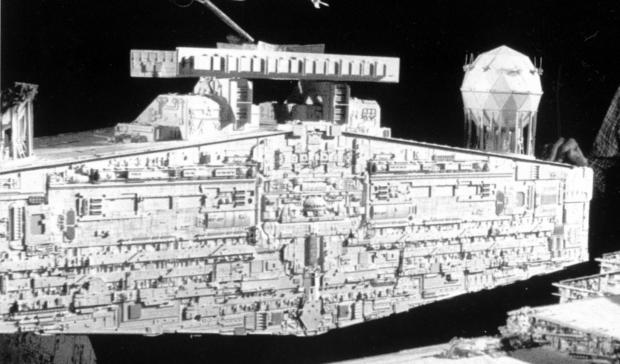
Greebles are small, repeated details added to a model to give it a sense of scale and a particular aesthetic. Certain classic sci-fi films popularized them, back when “model” more often meant a physical sculpture:
If you’re familiar with how to extrude the polys on a mesh, as described in my procedural mesh extrusion tutorial, then you already know how to add greebles to one. Not to spoil the fun, but to put it simply:
Adding simple greebles to a mesh can be accomplished by extruding all of the polys of the mesh by a random length.
However, you might have noticed that the above tutorial focuses only on extruding triangles, whereas the header image for this tutorial has square greebles. I had set up the mesh so that it was split into quads, and many of the meshes in LT (and possibly in your game) are made of polys with more than 3 indicies. So, in this tutorial, we’ll learn how to extrude a poly with n indicies, and we’ll apply that algorithm across a whole mesh to add greebles. We’ll also learn a couple of ways to vary the greebling algorithm to get less uniform results.
Surface Normal
Firstly, let’s learn how to compute the normal for a poly with an arbitrary n indicies. If we can assume that the poly is co-planar – that is, all of the verticies reside on the same flat plane- then it’s no different to compute the normal of a poly with n indicies than 3.
The surface normal is perpendicular to the face of the poly, which can be calculated by taking the cross product of two vectors pointing along the edge of the poly.
We then normalize that vector to ensure its length is 1, as all we want for the surface normal is a direction, and not a length.
function getFaceNormal (mesh, poly)
  Vec3 v1 = mesh:getVertex(poly[1])
  Vec3 v2 = mesh:getVertex(poly[2])
  Vec3 v3 = mesh:getVertex(poly[3])
  Vec3 e1 = v2 - v1
  Vec3 e2 = v3 - v2
  Vec3 normal = e1:cross(e2)
  return normal:normalize()
end
If we can’t safely assume that the poly is co-planar, then the above algorithm favors the plane on which whatever the first two indicies happen to be. For a more accurate representation of the direction that the poly is facing, we can instead take an average of all of the edge cross-products, like so:
function getFaceNormal (mesh, poly)
  Vec3 n = Vec3(0, 0, 0)
  for i = 1, #poly -2 do
    Vec3 v1 = mesh:getVertex(poly[1])
    Vec3 v2 = mesh:getVertex(poly[1+ i])
    Vec3 v3 = mesh:getVertex(poly[2+ i])
    n:add((v2 - v1):cross(v3 - v1))
  end
  return n:normalize()
end

Extrusion
Now that we have the surface normal information, we’re ready to extrude the poly in the direction of the normal. Put simply, to extrude a poly, we create new verticies by translating the old verticies in the direction of the surface normal.
In more detail:
- Creating new verticies ‘above’ the old ones, in the direction of the normal.
The new verticies can be calculated as:
(position of old vertex) + (normal direction)
This ‘moves’ the old position in the direction of the surface normal.
For example, look at the picture above and see at how v1 moves in the direction of the normal to v5. - Creating quads to stitch all of the new and old vertices together.
Note that there’s one new quad created for every index in the new poly.
For example, look at the quad created from v8, v7, v3, and v4 in the picture above. - Replacing the old poly with the new poly created by the new verticies.
For example, look at the quad created from v5, v6, v7, and v8 in the picture above.
function extrudePoly (mesh, polyIndex, length)
  int[] poly = mesh.polys[polyIndex]
  int[] newPoly = []
  Vec3 n = getFaceNormal(mesh, poly)

  -- (1) Create extruded verts
  for j = 1, #poly do
    local p = mesh:getVertex(poly[j])
    newPoly[#newPoly + 1] = #mesh.verts
    -- length determines the length of the extrusion
    mesh:addVertex(p + (n*length))
  end

  -- (2) Stitch extrusion sides with quads
  for j0 = 1, #poly do
    local j1 = j0 % #poly + 1
    mesh:addQuad(
      poly[j0],
      poly[j1],
      newPoly[j1],
      newPoly[j0]
    )
  end

  -- (3) Move existing face to extruded verticies
  for j = 1, #poly do
    mesh.polys[pi][j] = newPoly[j]
  end
end
Greebling the Whole Mesh
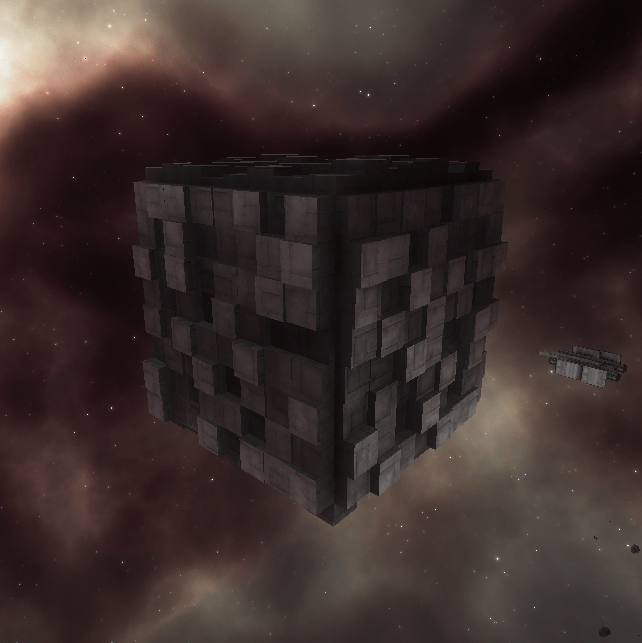
Now that we have a getSurfaceNormal() function and an extrude() function, greebling is quite simple! We just apply the extrude() function to every poly on the mesh. We apply the extrusion with a random length to ensure each extruded poly is a slightly different size, which gives the textured look. The algorithm below was applied to the box pictured above, which is made entirely of quads.
function greeble (mesh)
  for i = 1, #mesh.polys do
    -- these random values are arbitrary :p
    float length = random:getUniformRange(0.1, 1.0)
    extrudePoly(mesh, i, length)
  end
  return mesh
end
Congrats if you’ve made it this far, and your greebling works ^.^ But there’s more that we can do! This greebling is rather uniform. Here are two examples of modifications we can add to make it more interesting.
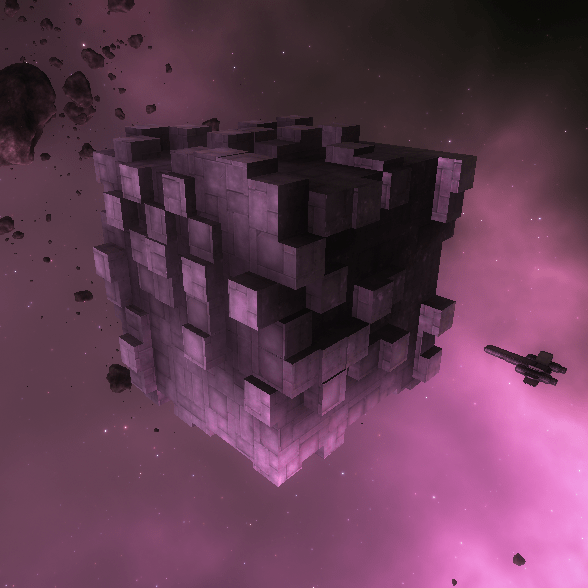
Modification 1: Add randomness to whether or not greeble is applied
This is fairly straightforward: just roll the die as to whether or not the greeble is applied to every poly. This makes the greebling a little less uniform. The algorithm below was applied to the box above.
 for i = 1, #mesh.polys do
   if random:chance(0.33) then
     float length = random(0.1, 1.0)
     extrudePoly(mesh, i, length)
   end
 end
 return mesh
end
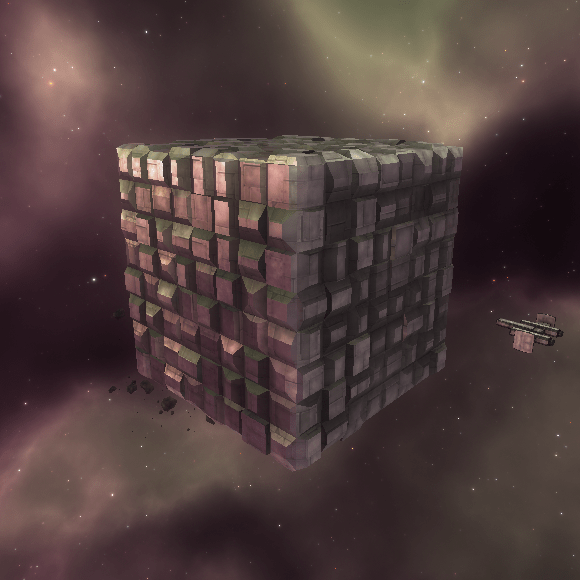
Modification 2: Add scaling to the extrusion
This requires a modification to the extrusion algorithm. When we create the vertices for the extruded poly, we can contract them towards the center of the poly a random amount for a little more visual interest.
First, our extrude() function will need to take an additional parameter to define the amount to contract the new poly. We’ll define this as a Vec3 called ‘scale’. To move the vertex towards the center, we interpolate the vertex position between its original position and the center of the poly by the ‘scale’ amount.
(If you need to learn an algorithm for finding the center of the poly, I recommend jumping to the triangulation tutorial real quick – jump to “centroid triangulation”.)
-- find the center of the poly
Vec3 c = mesh:getFaceCentroid(poly)
for j = 1, #poly do
  local p = mesh:getVertex(poly[j])
  newPoly[#newPoly + 1] = #mesh.verts
  self:addVertex (
    math.lerp(c.x, p.x, scale.x) + n.x * length,
    math.lerp(c.y, p.y, scale.y) + n.y * length,
    math.lerp(c.z, p.z, scale.z) + n.z * length
  )
  mesh:addVertex(p + (n*length))
end
Now, we can use this in the greeble algorithm by scaling by a random amount for each poly. This will achieve the look in the picture above.
function greeble (mesh)
  for i = 1, #mesh.polys do
    float length = random:getUniformRange(0.1, 1.0)
    Vec3 scale = (random:getUniformRange(0.1, 1.0),
                  random:getUniformRange(0.1, 1.0),
                  random:getUniformRange(0.1, 1.0))
    extrudePoly(mesh, i, length, scale)
  end
  return mesh
end
Fin
W00t, you made it to the end! Hopefully, you found this tutorial informative. If you use it, please comment or tweet me screenshots!
If you enjoyed this tutorial, see any typos or bugs, or have any other feedback, leave me a comment or tweet at me! You can follow me here on WordPress or on Twitter @so_good_lin. And be sure to keep track of @LimitTheory on Twitter – when it comes out, the production version of all of this code & more will be available for exploring and modding. 🙂
DISCLAIMER: Code presented here is pseudocode that does NOT necessarily reflect production Limit Theory code.

One thought on “Procedural Greeble Tutorial”