

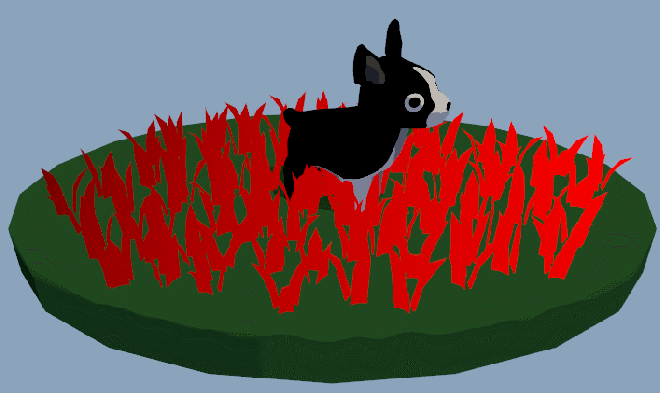
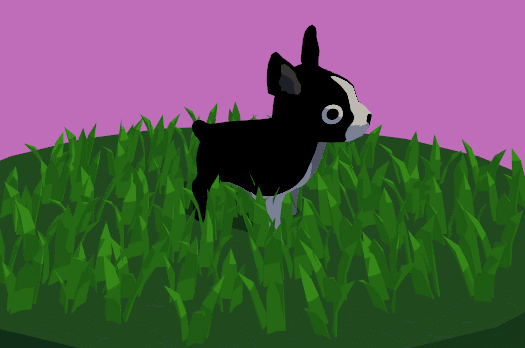
Hey y’all! Today, I want to show y’all how I made this wavy grass shader in Unity. The lighting is a simple cel shader, which I covered in a post on cel shading, so we’re going to focus on the vertex animation that creates the wave!
Shout-out to this Low-Poly Foliage asset pack, which is where I got the grass models from.
I took a bit of feedback from the Reddit posts I made about this blog! Redditor aramanamu had some great suggestions, a couple of which I got several times, so I decided to implement them in this post:


I hope this is what you were looking for! I highlighted code comments in orange, and I included in-progress screenshots for every step of this tutorial. ^^
If you have feedback about these tutorials, don’t be afraid to PM me on Reddit, contact me on Twitter, or comment on this post ❤
For your reference during the tutorial, here’s the final code for this shader, under an open-source licence:
-> Link to final code for Unity Grass Wave Shader
Now, on with the tutorial!
Overview
In summary: the animation is achieved in the vertex shader by sampling a gradient texture based on the x,z world position of the vertex, and using that sample value to move the x,z position of each vertex. The sample position is scrolled with time, which gives the ripple effect to the vertex movement. In addition, to prevent the base of the grass from moving, the animation speed is modified by the vertex y-position.
The gradient texture looks like this:

As you can see, it has different RGB values at each pixel on the texture. When we map each pixel to a world position, we’ll get different output per position. That output is used to change the speed of the vertex animation. Then, by scrolling our sample position over time, our output will change, giving the ripple effect.
Let’s break this down into 6 steps:
- Get normalized vertex world position
- Scroll sample position based on time
- Sample the gradient texture & modify vertex position based on sample
- Modify animation amount based on vertex height
- Apply lighting in the fragment shader
1. Get normalized vertex world position
We’re going to sample a wind texture to modify the speed of the vertex animation, using each pixel color in the wind texture to get a speed for the animation to move at.
_WorldSize("World Size", vector) = (1, 1, 1, 1)
// get vertex world position
float4 worldPos = mul(input.vertex, unity_ObjectToWorld);
// normalize position based on world size
float2 samplePos = worldPos.xz/_WorldSize.xz;
// test sample position
output.sp = samplePos;
float4 frag(vertexOutput input) : COLOR
{
    return float4(input.sp.x, 0, 0, 1);
}

2. Scroll sample position based on time
To give the ripple effect, we want to move our sample position over time. Since we’re sampling a smooth gradient texture, this will give the effect of the wave changing speed with ripples of wind.
Firstly, we need to add a new Property to define the speed of the scrolling, which is essentially the speed of the “wind”:
_WindSpeed("Wind Speed", vector) = (1, 1, 1, 1)
In our vertex shader, we need to add just one line in order to scroll the sample position (bolded below):
// get vertex world position
float4 worldPos = mul(input.vertex, unity_ObjectToWorld);
// normalize position based on world size
float2 samplePos = worldPos.xz/_WorldSize.xz;
// scroll sample position based on time
samplePos += _Time.x * _WindSpeed.xz;
(Read up on what Time.x means here. Basically, it’s just Time/20, which is a small value, so I made _WindSpeed large.)
Now, in our fragment shader, we need to take the frac() value of the sample position in order to correctly test the value.
Why? Because adding Time to the samplePos will cause it to grow outside the bounds of 0-1, which doesn’t give us an accurate color value, as color values should be between 0-1. Frac() takes the fractional component, or the value of the input after the decimal point, which keeps it between 0-1 and loops it back around to 0 after it’s passed 1. Read the CG documentation on Frac here.
float4 frag(vertexOutput input) : COLOR
{
    return float4(frac(input.sp.x), 0, 0, 1);
}

3. Sample the gradient texture & modify vertex position based on sample
Now, we’re going to use that sample position to sample the gradient texture.
Firstly, you’ll need to create a gradient texture which blends perfectly on the left and right edges of the texture. We’re going to use this gradient to change the speed that the grass is animating.
The perfect blending on the left-to-right edge is VERY important. See how in the above gif, the x-value has a hard edge at 0 and 1? If your gradient doesn’t blend perfectly at those values, you’ll get weird jittering at that edge of the animation.
Here’s the texture I used again:
Since we already normalized the world position value, sampling is simple. Here’s how we sample the gradient texture based on our sample position.
float windSample = tex2Dlod(_WindTex, float4(samplePos, 0, 0));
_WaveSpeed("Wave Speed", float) = 1.0
_WaveAmp("Wave Amp", float) = 1.0
// get vertex world position
float4 worldPos = mul(input.vertex, unity_ObjectToWorld);
// normalize position based on world size
float2 samplePos = worldPos.xz/_WorldSize.xz;
// scroll sample position based on time
samplePos += _Time.x * _WindSpeed.xz;
// test sample position
output.sp = samplePos;
// apply wave animation
output.pos.z += sin(_WaveSpeed*windSample)*_WaveAmp;
output.pos.x += cos(_WaveSpeed*windSample)*_WaveAmp;
4. Modify animation amount based on vertex height
You probably noticed that the WHOLE grass object is moving in the above gif, and that doesn’t look very realistic! In reality, the base of the grass that’s attached to the ground doesn’t move. In addition, any plant waving in the wind is usually bendier the further away it is from its root.
Notice how, in this picture, the top of the plant has blown much further away from its base than parts of the plant closer to the base:

So, to simulate that in our grass, we’re going to modify the animation based on the vertex height.
First of all, we don’t want the base of the plant to move at all. To do that, let’s create a float called heightFactor, and multiply our animation by it. If the y-position of the vertex is below some arbitrary _HeightCutoff value, then heightFactor should be 0. Then, if we multiply the animation by a 0 heightFactor, it’ll cancel any animation.
First, we need to add the _HeightCutoff to our properties:
_HeightCutoff("Height Cutoff", float) = 1.0
// 0 animation below _HeightCutoff
// heightFactor will either be 0 or 1float heightFactor = input.vertex.y > _HeightCutoff;// apply wave animation
output.pos.z += sin(_WaveSpeed*windSample)*_WaveAmp * heightFactor;
output.pos.x += cos(_WaveSpeed*windSample)*_WaveAmp * heightFactor;
Now, let’s make the animation stronger the higher the vertex is. To do this, we’ll need another new property called _HeightFactor, and we’ll apply that to our heightFactor value. I used the pow() function in order to make the animation exponentially larger with the increasing y-value.
heightFactor now returns a value that’s either 0 OR the value of y^(_HeightFactor):
// 0 animation below _HeightCutoff
float heightFactor = input.vertex.y > _HeightCutoff;
// make animation stronger with heightheightFactor = heightFactor * pow(input.vertex.y, _HeightFactor);// apply wave animation
output.pos.z += sin(_WaveSpeed*windSample)*_WaveAmp * heightFactor;
output.pos.x += cos(_WaveSpeed*windSample)*_WaveAmp * heightFactor;
If you’ve got this all working, your animation should now look something like this. Again, you’ll probably need to fiddle with _HeightFactor to make it look reasonable:

5. Apply lighting in the fragment shader
Woohoo! If you’ve made it this far, you’ve gotten through the hard part of the tutorial. You’ve successfully animated the grass!!!
I already wrote a tutorial on cel shading, so I’m not going to go in-depth here on how it works. Instead, let’s just look at what the complete vertex and fragment shaders look like with the lighting included.
Firstly, add the camera clip space vertex position and the world space normal position to your vertex output:
vertexOutput vert(vertexInput input)
{
    vertexOutput output;

    // convert input to clip & world space    output.pos = UnityObjectToClipPos(input.vertex);    float4 normal4 = float4(input.normal, 0.0);    output.normal = normalize(mul(normal4, unity_WorldToObject).xyz);    // get vertex world position
    float4 worldPos = mul(input.vertex, unity_ObjectToWorld);
    // normalize position based on world size
    float2 samplePos = worldPos.xz/_WorldSize.xz;
    // scroll sample position based on time
    samplePos += _Time.x * _WindSpeed.xy;

    // sample wind texture
    float windSample = tex2Dlod(_WindTex, float4(samplePos, 0, 0));

    // 0 animation below _HeightCutoff
    float heightFactor = input.vertex.y > _HeightCutoff;
    // make animation stronger with height
    heightFactor = heightFactor * pow(input.vertex.y, _HeightFactor);

    // apply wave animation
    output.pos.z += sin(_WaveSpeed*windSample)*_WaveAmp * heightFactor;
    output.pos.x += cos(_WaveSpeed*windSample)*_WaveAmp * heightFactor;

    return output;
}
And finally, apply lighting in the fragment shader. You’ll need a ramp texture, like the one I’m using below, and a new Property for the base color of the grass. (Note that _WorldSpaceLightPos0 and _LightColor0 are provided by Unity.)

Basically, this shader uses the dot product between the light direction and the vertex surface normal to sample the ramp texture.
float4 frag(vertexOutput input) : COLOR
{
    // normalize light dir
    float3 lightDir = normalize(_WorldSpaceLightPos0.xyz);
    // apply lighting
    float ramp = clamp(dot(input.normal, lightDir), 0.001, 1.0);
    float3 lighting = tex2D(_RampTex, float2(ramp, 0.5)).rgb;
    float3 rgb = _LightColor0.rgb * lighting * _Color.rgb;
    return float4(rgb, 1.0);
}
Fin
Woohoo! I hope you learned a lot from this tutorial. We covered texture sampling, vertex animation, the frac() function, and lots of math techniques!
Here’s the full code again, under an open-source license.
If y’all have any questions about writing shaders in Unity, I’m happy to share as much as I know. I’m not an expert, but I’m always willing to help other indie devs 🙂 And do give me feedback about the tutorials, I love hearing from y’all!
Good luck,
Lindsey Reid @so_good_lin
PS, here’s the Unity graphics settings for this tutorial.

In the past, all my wavy/dancing plants have been done with armature or blend based animations. This tutorial is awesome. I’m still having some issues with the animation (it’s like my _Time variable is not working) but I’ll figure it out – that’s half the fun. Mainly wanted to say how nice it is you shared this (and the other shaders – my next to play with is the water one). Thank you!
LikeLike
Aw, thank you for the kind comment! I’m glad you’re finding them interesting. If you need help with your shader, feel free to comment again & let me know what error/ problem you’re encountering, or DM me on Twitter.
LikeLike
I’ll be working on this in my “hobby time” but should figure it out soon. I will post in the comments if I get stuck. Thanks again!
LikeLike
Okay, I should be working my day job, but…
Progress! My main issue was my own ignorance. Many shaders update in the Editor, but apparently to get _Time variable to work you need to run the game in Play Mode. On a side note: I also noted (via your helpfully-provided link above) that the _Time has four values t/20, t, t*2 and t*3. I played with that and then put it back to _Time.x – like you said it’s just a multiplier thing.
Then I made some more progress after rereading your tutorial a bit more carefully. I made all my plants fit into the world space by moving arranging them into global coordinates bounded by the size of the world (and increased it to 5x for my case). It’s all looking good in the Game View! Another side note: The Scene View gets a weird anomaly as if the texture was getting cutout-style transparent holes on the top of the models. It’s as if the height factor was warping. Irregardless it works great in the Game View.
Your technique is awesome for both saving modelers from having to animate their plants and also (yes? likely?) huge CPU savings by offsetting the task to the GPU. Really nice! Thanks again! (Sorry for the long blurb – feel free to delete any of it). 🙂
LikeLike
AH yes I probably should have noted that Time only works when you run the game. I might add that to the tutorial for clarity.
I’ve also had some weird issues with the models cutting out. I’m still trying to figure out what’s going on there.
I was inspired by the grass blowing in the wind in Breath of the Wild. I’m not sure if animations of a whole field of grass waving in the wind, in a way that looks coordinated, is realistically possible for an animator to create? I feel like things like this are often handled with vertex animation shaders.
I’m so glad you enjoyed it, thank you again for the kind comments. 🙂
LikeLiked by 1 person
Cool. Thanks for sharing your inspiration too. I’ll have to check out Breath of the Wild – I love the Zelda series but never got to that one.
I’m still picking through your code and it’s been very educational for me to play with –
and rather mind-blowing in some ways, especially the ideas of images as functions and the global behaviors.
I was thinking of how sometimes when you look at a huge field (and even water sometimes) how you’ll see larger (gust?) moving patterns on them in addition to the ones you’ve captured. So, for fun, in some distant future, I may try to mod your code to allow yet another gray-scale pattern (probably itself being slid over time) to be used to affect strength in those areas (like gust zones?!) while still being tied to your sin() pattern. It’s been very windy in Colorado today I was taking some videos of the bushes and waves on these ponds out back of my house. Really fun to think about nature and how one might simulate it – especially in the cartoony-ways.
LikeLike
Haha, I definitely didn’t invent images-as-data or images-as-functions- that’s a pretty common shader technique. I’m glad that you got that takeaway from this tutorial, though. I’m hoping to hint at high-level ideas and reusable techniques with these specific examples.
I also look at nature for ideas quite a bit ^^ I find stylized interpretations to be more interesting, as I feel like photorealistic rendering is too easy of an interpretation, and somebody with a larger team and more time than me is going to figure it out anyway hahaha.
LikeLike
Well, I certainly enjoyed this tutorial and did get a lot out of it!
For my particular models (made in Blender) I finally got rid of the weird clipping thing when I removed the ” output.pos.z” step. I then realized I must be using a different local coord system and tried putting in “output.pos.y”. It seems to be working!
Yeah, I hear you, on the larger team thing. 🙂
LikeLike
Interesting, ok!
LikeLike
Hi, i’m having trouble getting this to work and wondering if there’s something i’ve missed when adding this to my project.
I’m a beginner/havn’t written a shader before.
In short while following your tutorial:
– I’ve created a ‘Grass’ material and selected custom shader/Grass.shader.
– I’ve then added the material to the grass model and added it to the game scene.
– I’ve then imported the gradient texture and ramp texture that you’ve embedded in this tutorial, and added them to the shader fields.
– I’ve changed the worldsize to match the bounds of my scene, and have played around with the cut off, wind speed & amplitude. No matter the change, when I hit play the grass isn’t waving.
Have I missed a basic step, for example the texture type for the Gradient or Ramp texture? OR perhaps adding the shader to a material and then adding the material to the grass model is not the right way to add the shader?
Any help would be great.
Thanks,
Tim
LikeLike
I would start with a more basic tutorial if you’ve never written a shader before! Maybe one like: https://www.alanzucconi.com/2015/06/10/a-gentle-introduction-to-shaders-in-unity3d/
LikeLike
Hello Lindsey, thanks for the tutorial, I was following it and everything should work, it seems though, that the is models get cut-off and don’t animate the texture. Any input on why it could be happening?
LikeLike
Hey, do you still need help lol? I took a little hiatus from maintaining this blog. 🙂
LikeLike
I could do one of my amateurish videos on how I used your shader and share the link here, if you like. I’ll have to dig up the Unity scene, but learning shaders has been a side project for me for a while, and I did learn much from you here. I’d be happy to share. Let me know Lindsey. -Mike
LikeLiked by 1 person
Hmm i seem to be able to see the grass through the terrain/walls of my level. I dont know what is causing it
LikeLike
Hey, great post this is the best example of vertex movement in world space I’ve read, thanks for the time and effort, one thing thats a bit unclear is how the values in _WorldSize get used, is it using all 4 values or just UV or just XY?
LikeLike
Just XZ!
LikeLike
Instead of using y vertex position for modifying animation amount, consider using UV’s (U component). In this way, if you batch multiple grass obejcts into one single mesh, animation will still work correctly. Otherwise, if you have strands at different heights, you will have a problem of moving vertices where they shouldn’t move.
LikeLiked by 2 people
I’ll have to try this out :0
LikeLike
thanks oliver. This actually does make sense. as if someone wants to use dynamic batching or gpu intsancing/ MeshDrawIndirect with vertex.y approach it won’t work as we can’t access that right? rather just use the UV.
Also Linden really nice effort and thanks for putting in some effort to write down this.It did cleared alot of things.
LikeLiked by 1 person
Did anyone figure out how to do this? I’m trying to get GPU Instancing working, but it’s not going well.
LikeLike
Thanks for this. It seems that I had to modify the shader code a bit to get this working (I am using GPU instancing to draw a lot of grass at once).
Instead of modifying the clip pos output (“output.pos = UnityObjectToClipPos(input.vertex)”) I had to modify the vertesx world-position and then convert from world position to clip position by (“mul(UNITY_MATRIX_VP, float4(vertex, 1))”) where vertex is the world position.
Our artist also baked the “influence” to vertex colors so weaving is artist controllable and not hard coded to shader.
LikeLike