

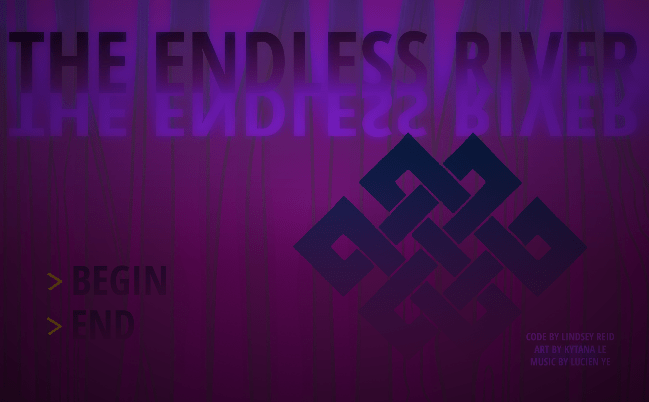
Hey, y’all! My friends Kytana Le, Lucien Ye, and I created a chill, atmospheric, color-based puzzle game called The Endless River during the 2018 Global Game Jam. In the spirit of the GGJ, I want to share with you how we created the post-processing effect for the game that create the vignette.
We’re going to walk through:
- How to add post-processing effects to a camera in Unity, and
- How to write a shader with a vignette and color effect
Here’s the final code for the post-processing shader used in this tutorial, for your reference. It’s under an open-source license 🙂
Good luck!
How to add Camera Effects
Unity comes with plenty of built-in post-processing effects, including the bloom we used for this game. But, if you want to write your own effects, you’ll need to attach a script to your main camera to tell it to pass the camera image through a material first before drawing it to the screen.
Below, you’ll see the super-simple script I used to achieve this. Basically, this script is called on any script attached to a camera, and sends what the camera has rendered through source, applies the material, and sends the result to destination, which is what you see rendered on screen.
I added a [ExecuteInEditMode] tag so that I wouldn’t have to run the game before seeing the effects of the material.
using UnityEngine;

[ExecuteInEditMode]
public class PostProcess : MonoBehaviour {

  public Material material;

  void OnRenderImage (RenderTexture source, RenderTexture destination) {
    Graphics.Blit(source, destination, material);
  }
}
Now, attach that script to the main camera. Your screen is probably black without a material with a working shader set- no worries! Now let’s, create a new material with a new custom shader on it, and assign that material to the script.

Now, write an extremely basic shader that only outputs the color from the _MainTex property. Assign this shader to our new material. You don’t need to fill in the main texture property in the material; our script above fills it in with the image that the camera rendered.
Since these effects will only be color effects, and don’t really require anything fancy to happen in the vertex shader, I skipped writing all of the input/output structs for the vertex shader and the vertex shader itself. In its place, Unity provides a struct called v2f_img that provides the vertex position and texture coordinates, ideal for writing post-processing effects like these.
Here’s what the whole shader looks like:
Shader "Custom/PostProcess" {
  Properties {
    _MainTex("Texture", 2D) = "white" {}
  }

  SubShader {
    Pass {
      CGPROGRAM
      #pragma vertex vert_img
      #pragma fragment frag
      #include "UnityCG.cginc" // required for v2f_img

      // Properties
      sampler2D _MainTex;

      float4 frag(v2f_img input) : COLOR {
        // sample texture for color
        float4 base = tex2D(_MainTex, input.uv);
        return base;
      }
      ENDCG
}}}
You should now see your scene in the Game view as normal. We haven’t added any effects yet, but your shader is all set up to do so! Now, we can focus on writing those effects.

Vignette Effect
Our post-processing shader has two effects: a vignette and a color. Let’s start with the harder one, cause we’re hardcore like that. 😈
If you use Instagram, you’re probably overly familiar with vignettes. Basically, the edges of an image are darkened for a cool effect:

The way I interpreted this effect, the dark edges are created by darkening the image the farther away a pixel is from the center of the image. That’s what gives the vignette the circular shape, and darkens the corners more than the center of the edges of the image.
To create this effect in a shader, we first need to know how far away is a pixel is from the center of the image. Firstly, it’s important to know that the center of an image is at (0.5, 0.5)– this means halfway through the X-coordinates, and halfway through the Y-coordinates, as these coordinates range from 0-1.
So, let’s first write an algorithm to find how far away a pixel is from the center, and then write that information to the image to ensure it’s correct.
CG has a handy distance function to determine the distance between two points. We’ll then output that distance as the RGB color of the image, giving us a black and white image with pixels closest to the center being black, as that’s where the distance value is the smallest.
float distFromCenter = distance(input.uv.xy, float2(0.5, 0.5));
return float4(distFromCenter, distFromCenter, distFromCenter, 1.0);
Here’s what your image should look like:

Now, notice that the image above is the opposite of the color we want. We want it to get darker at the edges, and lighter at the center, so let’s reverse the output of the distance value by subtracting it from 1:
float vingette = 1 - distFromCenter;
Now that we have the vignette value ready, let’s multiply our base color by the vignette value to darken it!
CG’s saturate function clamps the values in base to 0-1.
base = saturate(base * vignette);
return base;
You should now have a decent looking vignette on your image! But we’re not done yet :0
This vignette could use some tuning values. One way to do this is to interpolate the distance between two min and max values, which both give unique properties to fiddle with.
First, add two new Properties:
_VRadius("Vignette Radius", Range(0.0, 1.0)) = 1.0
_VSoft("Vignette Softness", Range(0.0, 1.0)) = 0.5
Now, add the interpolation to the fragment shader. CG’s smoothstep function is perfect for this, as it interpolates smoothly between two values based on the third value. Replace our previous line to assign vignette with the following:
float vignette = smoothstep(_VRadius, _VRadius - _VSoft, distFromCenter);
And now, tune those properties to your liking! My final output for the vignette looks like this. As you can see, I pushed the vignette back towards the edges a bit.
Congrats, you achieved the most complicated part of this tutorial! Let’s finish off with a fun and easy effect.
Color Effect
There are a ton of cool things you can do with post-processing color effects. For this game, we did the simplest version, which is just adding a single color on top of the rendered camera image to give the whole game a cohesive tone.
To do so, first add this color to your Properties:
_Color("Color", Color) = (1, 1, 1, 1)
And then multiply your base texture color by this new color:
base = base * _Color;
Ta-daa! Your image should now have a subtle tone overtop it. I tuned our image to a dark purple color:
Fin
Woohoo, you did it! If you need any more guidance, here’s the link to the final code for this post-processing shader again. You can also download the whole Unity project from that repository and see how we did the rest of the game, if you like. Just make sure any projects you use our assets in are also open-source 🙂
If y’all have any questions about writing shaders in Unity, I’m happy to share as much as I know. I’m not an expert, but I’m always willing to help other indie devs 🙂 And do give me feedback about the tutorials, I love hearing from y’all!
Good luck,
Lindsey Reid @so_good_lin

Thanks for this. I’ve just been getting into shaders and was looking for how to branch out into screen effects (only done surface and vertex shaders so far).
LikeLike
Glad you’re enjoying it 😀
LikeLike
Hi, thank you for this. I downloaded your project, however, I can’t see in your project (or mine after following above) the vignette and really not sure where to begin to resolve it. Should it be working in your project sample?
Cheers
LikeLike
Thanks! This is a really cool shader 🙂
LikeLike
Thank you for such a clear, and thoughtful tutorial! 🙂 It was lovely that you thought to include the part about instant rendering, how the blit stuff links to the materials etc. 🙂 It made it really easy to get up and running! 🙂
I’m hoping to take it another way too, and posterise the screen a bit, or line draw things? Thanks for a brilliant starting point. 🙂
LikeLike