Today, I want to cover two super popular topics for shaders in Unity:
- How to create cel-shaded lighting
- How to create an outline effect
In addition to this code, you may want to check out the Unity graphics settings for this tutorial, which are important for lighting a cel-shaded game well.
If you like this post, be sure to follow me on Twitter 🙂
If you’ve never written shader code before, or used Unity, you still may get plenty out of this post, because the algorithms used to write the cel shader and the outline are applicable to any shader. If you do write shader code in Unity, you’ll find the rest of the techniques extra helpful 🙂
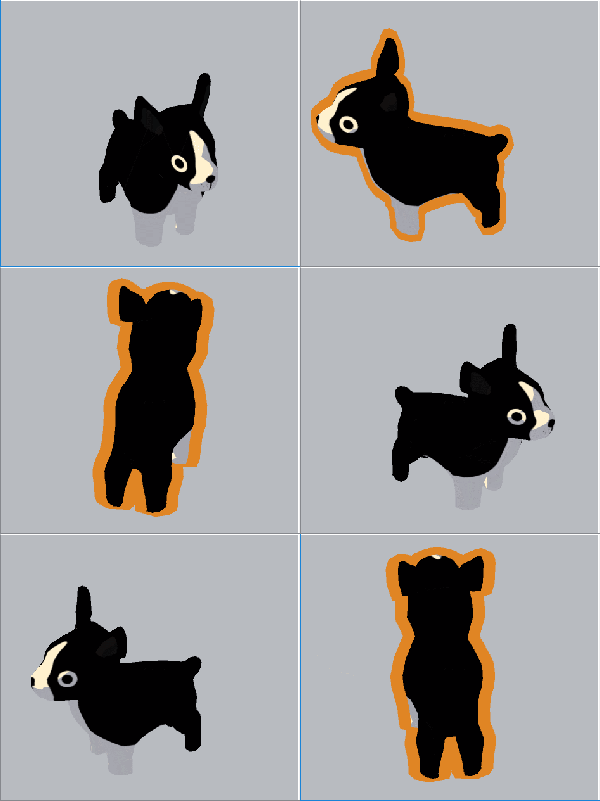
This is the end result, applied to an adorable Boston Terrier model made by amazing artist Kytana Le:

And here’s the full code for you to reference while following the tutorial:
–> Link to final code for the cel and outline shader
The High Level
The cel shader was written in Unity’s shader language, which is CG, but with some preprocesser tags and formatting that let you access Unity features.
The shader has two passes: one that applies the texture and lighting, and one that applies the outline. The shader’s input, which are configured in the Unity editor, are the main texture, the ramp texture (used for lighting), and the outline size and color. I’ll provide the ramp texture below.
Cel – Shaded Lighting
The texture/lighting pass is nothing advanced. To calculate lighting, it takes the dot product of the surface normal and light direction to result in a normalized (0-1) scaler, which it then uses to sample a position on the ramp texture on the x-axis. The ramp shader is a 2d texture that only has two colors on it: dark blue on the left, and white on the right. Here’s the texture I used:

You could also use your own texture with multiple colors. The important thing to achieve the cel look is that the ramp texture is blocky, not smooth.
The position on the x-axis of the ramp shader then corresponds to either of those colors. Because our light value returns 0-1, it will sample an area on the texture between 0 (the far right x-pos) to 1 (the far left x-pos). Areas on the model which are less exposed to light (in shadow) thus get the dark blue color, and areas on the model which are more exposed to the light get the white color.
This color is multiplied with the input texture’s albedo. Since lighting is one of two colors (dark blue or white), you get a cel-shaded effect with sharp edges on the shadows and no blending.
Here’s what the fragment shader looks like:
// convert light direction to world space & normalize
// _WorldSpaceLightPos0 provided by Unity
float3 lightDir = normalize(_WorldSpaceLightPos0.xyz);

// finds location on ramp texture that we should sample
// based on angle between surface normal and light direction
float ramp = clamp(dot(input.normal, lightDir), 0, 1.0);
float3 lighting = tex2D(_RampTex, float2(ramp, 0.5)).rgb;

// sample main texture for color
// for ex, in the image above, the main texture has the dog's
// black and white color and eyes
float4 albedo = tex2D(_MainTex, input.texCoord.xy);

// get final color
float3 rgb = albedo.rgb * lighting * _Color.rgb;
return float4(rgb, 1.0);
Outline Effect
The outline pass is a satisfying trick. To do it, I had to learn about how the z-buffer and stencil buffer work. To put it quite basically, the z-buffer is used to place objects visually in front of or behind each other in a simulated 3D space, and the stencil buffer is used to do special effects to override the z-buffer.
The outline is achieved by drawing a scaled version of the original mesh after the original mesh, and using the stencil buffer to not draw the outline where the original has already been drawn. That way, the scaled dog looks like it’s behind the original dog.
First, let’s create a second pass, after the lighting pass.
Here’s how to scale the mesh:
Achieving the scaled version of the mesh is simple: I scale each vertex along its normal direction by outlineSize. Scaling along the normals assures that the outline mesh will scale evenly around the entire object mesh, so even concave parts appear covered by an even thickness outline. The larger outlineSize is, the thicker the outline will be.
Here’s what that code looks like in the vertex shader:
float4 newPos = input.vertex;

// normal extrusion technique
float3 normal = normalize(input.normal);
newPos += float4(normal, 0.0) * _OutlineExtrusion;

// convert to world space
output.pos = UnityObjectToClipPos(newPos);
Now, let’s use the stencil buffer to draw it behind the original pass:
Using the stencil buffer is the other important half of this trick. The first pass (the lighting and texturing pass) writes to the stencil buffer. (4 is an arbitrary reference number.) The second pass (the outline pass) reads the stencil buffer, and, where it sees the same reference already written, keeps the original pixel in place. This achieves the effect of making the scaled mesh look like it’s behind- or only contouring- the original mesh. I also make sure to turn culling off, so that we don’t discard any vertexes of the outline mesh.
Here’s the configuration for each pass to use the stencil buffer & z-buffer correctly:
// Lighting/ Texture Pass
Stencil
{
Ref 4
Comp always
Pass replace
ZFail keep
}

// Outline Pass
Cull OFF
ZWrite OFF
ZTest ON
Stencil
{
Ref 4
Comp notequal
Fail keep
Pass replace
}
Finally, each pixel of the outline mesh is filled in with the same solid color. We don’t really need lighting for a cartoonish outline.
Here’s the extremely simple fragment shader for the outline pass:
return input.color;
Ta-daa!!! A beautiful outline.
Common Mistakes
Mistake #1: Blended cel shading. This is clearly a rookie mistake from a first-time shader writer. My first try at the cel shader had some blended edges on the shadows, which is not what we want for a hard cel look. The mistake I made was doing the lighting calculation in the vertex shader step. Because the vertex shader is per-vertex, every pixel in between is linearly interpolated, which means you end up with a blended effect for some pixels if you do lighting in the vertex shader. Moving the lighting calculation to the fragment shader, which is calculated per-pixel, fixed this immediately. Funnily enough, not ALL of the faces on the model were blended, which turned out to be because the model was non-manifold, which has to do with mistake #3.

Mitake #2: Uneven outline. You can see in the image above that the outline isn’t smooth and evenly contouring the mesh. The original algorithm I had for scaling the mesh didn’t include the normals- it was just multiplying the vertex by outlineSize. This doesn’t work for convex models, which really any complicated model that isn’t a pure cube or sphere is probably going to be. Scaling along the normals made a nice, even outline.
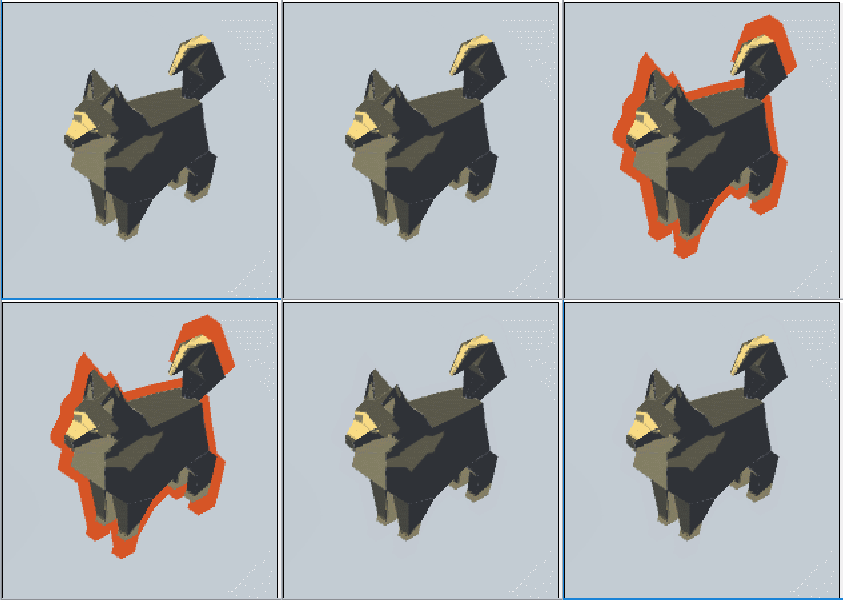
Mistake #3: Broken pieces of the extruded mesh. When using the low-poly shibe above, and applying the extrusion technique for scaling, there were gaps between each face. This is because the low-poly shibe has some faces of the mesh that aren’t really connected on the edges that they meet at, making it a non-manifold mesh. Then, when the vertexes are extruded, the faces don’t remain visually connected. I had to use a manifold mesh for anything using the outline shader, which is really almost any mesh that isn’t low-poly.
Mistake #4: Missing pieces of the outline. This was because I originally didn’t have the cull:off tag on the outline pass. We don’t want to discard any parts of the outline pass, even if they’re technically “inside” the mesh.
Fin
Here’s a link to the final code for the cel and outline shader.
I hope y’all found this useful! If y’all have any questions about writing shaders in Unity, I’m happy to share as much as I know. I’m not an expert, but I’m always willing to help other indie devs 🙂
Good luck,
Lindsey Reid @thelindseyreid


Hello! I may have missed it some place, but what version of Unity are you using? I was giving this a try in Unity 5.5 and get: “Shader error in ‘Custom/CelEffects’: undeclared identifier ‘UnityObjectToClipPos’ at line 179 (on d3d11)”
That built-in function looks like it should be valid for my version: https://docs.unity3d.com/550/Documentation/Manual/SL-BuiltinFunctions.html
Not entirely sure what Unity’s beef is.
Thank you for writing these up. These posts are great!
LikeLike
Oh! I think you’re missing the UnityGC include on the last pass. Adding:
#include “UnityCG.cginc”
to the Outline pass appears to have fixed it for me.
LikeLike
Funny you should say that- I actually just tried importing the project into Unity 4 and it all imploded because 4 doesn’t have UnityObjectToClipPos. So you’re right about both. I’ll add the #include to the code in GitHub, and maybe a note that the code works in 5+. Thank you so much for the comment!
LikeLike
Hi Linden!
Is it possible to have the rendering mode of the cel shader to be transparent/cutout?
LikeLike
Yes, but you’ll need to specify the queue and blend mode in the shader: https://unity3d.com/learn/tutorials/topics/graphics/making-transparent-shader
LikeLike
Hi, Linden, thank you for your amazing tutorial. But I found that when I use some hard shape models, like a cube, the outline will be broken seems due to the calculation of normal. Do you know how to fix this visual bug for it?
LikeLike
Are you sure your mesh is manifold? That is, the mesh is actually attached along all of the edges? I’ve gotten this issue before with the dog, and it turned out to be an issue with the mesh. Unity’s default cube always gives me trouble with this.
LikeLike
Hi Liden,
Do you know why when we use the Skybox Clear flag for the Camera, the Outline doesn’t appear? And we can only use other Clear flags. These tutorials are so helpful for someone like me who’s trying to learn more about shaders. Keep up the good work!
LikeLike
I do not know what this is related to, but in my case, the shadow side of the model becomes the color of the middle of the _RampTex
The illuminated side is drawn correctly
LikeLike