

Heya, I’m Lin Reid, programmer on Limit Theory, and I’m going to show y’all how to make a water shader in Unity! This is totally non-Limit-Theory related… just writing some shaders for fun 😂
This tutorial is really a general graphics programming tutorial in disguise. The techniques we’re going to learn in this post- vertex animation and using depth textures- are basically applicable to any platform. However, I do go over a few of the quirks with getting camera depth textures to work in Unity so that you can make it work too.
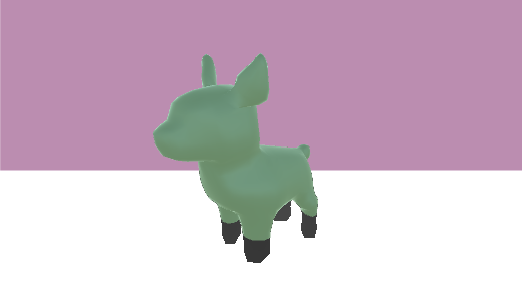
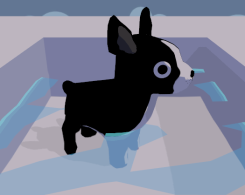
These are the two possible end results, applied to an adorable Boston Terrier model made by artist Kytana Le (please ignore crappy gif quality):


Notice how both have a foam line where the dog touches the water (but with different styles for each) and animated waves. We’re going to learn how to do both. Let’s start with the foam line!
Also, for reference, here’s the complete code for the shader:
–> Link to final code for Unity Water Shader
UPDATE: I now also have a tutorial for an ice shader that covers a distortion effect that looks GREAT with this water shader, like in the gif below. Finish this tutorial first, then follow the ice shader to add the distortion pass! ;0
Foam Line using Depth
The way we create this foam line around the dog is by reading the depth at every vertex on the mesh, and using that depth value to output a color. Specifically, we read the camera’s depth texture to find out how far away each vertex is from the camera. When an object is in the water, it shortens the distance. In the shader I wrote, we then have two options for how to use that depth value to create the foam line- one using the depth value as a gradient, and the other using the depth value to sample a ramp texture.
Here’s the Unity documentation on general depth textures and the camera depth texture, which you may want to keep handy during this tutorial.
Let’s get started by setting up our scene. Firstly, we need to enable the depth texture mode on the main camera. Annoyingly, there isn’t an option for this in the inspector- we have to write a script and attach this script to the camera. Here’s mine, in C#:
using UnityEngine;

[ExecuteInEditMode]
public class DepthTexture : MonoBehaviour {

  private Camera cam;

  void Start () {
    cam = GetComponent<Camera>();
    cam.depthTextureMode = DepthTextureMode.Depth;
  }

}
If you do this correctly, you should see a tiny message at the bottom of your camera properties in the inspector:

Now, we’re ready to write the shader! Let’s start by sampling the depth value at each vertex and using that to output a test color, just to make sure we’re reading the depth values correctly. (If you’re unfamiliar with any of the functions used, check the Unity documentation on shader built-in functions.)
Shader "Custom/Water"
{
SubShader
{
Pass
{

CGPROGRAM
// required to use ComputeScreenPos()
#include "UnityCG.cginc"

#pragma vertex vert
#pragma fragment frag

 // Unity built-in - NOT required in Properties
 sampler2D _CameraDepthTexture;

struct vertexInput
 {
   float4 vertex : POSITION;
 };

struct vertexOutput
 {
   float4 pos : SV_POSITION;
   float4 screenPos : TEXCOORD1;
 };

vertexOutput vert(vertexInput input)
  {
    vertexOutput output;

    // convert obj-space position to camera clip space
    output.pos = UnityObjectToClipPos(input.vertex);

    // compute depth (screenPos is a float4)
    output.screenPos = ComputeScreenPos(output.pos);

    return output;
  }

  float4 frag(vertexOutput input) : COLOR
  {
    // sample camera depth texture
    float4 depthSample = SAMPLE_DEPTH_TEXTURE_PROJ(_CameraDepthTexture, input.screenPos);
    float depth = LinearEyeDepth(depthSample).r;

    // Because the camera depth texture returns a value between 0-1,
    // we can use that value to create a grayscale color
    // to test the value output.
    float4 foamLine = float4(depth, depth, depth, 1);

    return foamline;
  }

  ENDCG
}}}
- Create a material using this shader
- Apply that material to a flat plane
- Use another object (in my case, a doggo) to intersect the plane
Note that the intersecting object MUST be able to use shadows in order to contribute to the depth texture. This is a weird Unity quirk- read the documentation for more info.
You should come up with something similar to the image below. The white area encompasses most of the texture, and grey areas mark where the depth value was < 1, where the intersecting object shortened the distance to the camera:
Properties
{
  // color of the water
  _Color("Color", Color) = (1, 1, 1, 1)
  // color of the edge effect
  _EdgeColor("Edge Color", Color) = (1, 1, 1, 1)
  // width of the edge effect
  _DepthFactor("Depth Factor", float) = 1.0
}
Now, let’s modify the fragment shader to create the gradient.
The line where we create foamLine is a bit confusing. Generally, what we’re trying to do is transform the depth value to something more usable to our shader, which tells us about how far way from the plane the position is, and not just from the camera. (The depth value before applying this transformation is relative to the camera’s view point.) I referenced this open source code by Daniel Zeller to be able to figure out how to do this transformation, and to be honest I still don’t understand the wizardry behind subtracting the screen position w value from depth, but that’s the magic of shaders sometimes.
In addition, we multiply by the _DepthFactor to have a bit more customization over the resulting value, and we saturate the value to clamp it from 0-1. We subtract the resulting value from 1 (still resulting in a 0..1) value so that the foamLine value is larger the “deeper” it is.
float4 frag(vertexOutput input) : COLOR
{
  float4 depthSample = SAMPLE_DEPTH_TEXTURE_PROJ(_CameraDepthTexture, input.screenPos);
  float depth = LinearEyeDepth(depthSample).r;

  // apply the DepthFactor to be able to tune at what depth values
  // the foam line actually starts
  float foamLine = 1 - saturate(_DepthFactor * (depth - input.screenPos.w));

  // multiply the edge color by the foam factor to get the edge,
  // then add that to the color of the water
  float4 col = _Color + foamLine * _EdgeColor;
}


float4 frag(vertexOutput input) : COLOR
{
  float4 depthSample = SAMPLE_DEPTH_TEXTURE_PROJ(_CameraDepthTexture, input.screenPos);
  float depth = LinearEyeDepth(depthSample).r;

  float foamLine = 1 - saturate(_DepthFactor * (depth - input.screenPos.w));
  // sample the ramp texture
  float4 foamRamp = float4(tex2D(_DepthRampTex, float2(foamLine, 0.5)).rgb, 1.0);

  float4 col = _Color * foamRamp;
}
Common Issues
If you can’t get correct depth texture output at all:
- Make sure your intersecting object is using a material that can cast shadows.
- Make sure your intersection object has “cast/receive shadows” turned on in the inspector.
- Make sure you attached your C# depth texture script to your main camera.
- Fiddle with the near/far view planes on your camera.
If you’re getting weird output on your depth highlight:
- If you’re sampling a ramp texture, make sure it’s clamped.
- If you’re already animating the water, make sure you’re calculating vertex position BEFORE checking depth.
Wave Animation
And now, the waves! If you’ve never written an animated shader before, this should be a fun one to start with. The secret ingredient to animating a shader is to add Time to your algorithms. Unity gives you a built-in value for time called _Time. The algorithm looks like this:
- Sample a noise texture for a random value, which creates the non-uniform-ness of the waves
- Create a wave value by taking sin(time * noiseValue), which creates the oscillating up-and-down motion
- Add the wave value to the vertex position
There are many different ways to create random values in shaders, so you can use whichever method you prefer for step #1. If you’re new to shaders and want to skip writing your own noise function, however, you can just sample a noise texture like this one:
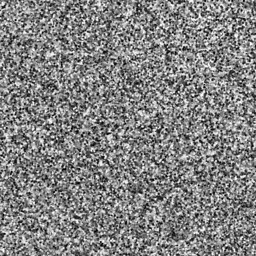
Taking sin(time) ensures that our random value oscillates back and forth with time, which is what creates the wave-like motion. The randomness then ensures that the motion is different for each vertex.
Here are the properties you need to add:
float _WaveSpeed;
float _WaveAmp;
sampler2D _NoiseTex;
And here’s what the vertex shader code looks like:
// convert to camera clip space
output.pos = UnityObjectToClipPos(input.vertex);

// apply wave animation
float noiseSample = tex2Dlod(_NoiseTex, float4(input.texCoord.xy, 0, 0));
output.pos.y += sin(_Time*_WaveSpeed*noiseSample)*_WaveAmp;
output.pos.x += cos(_Time*_WaveSpeed*noiseSample)*_WaveAmp;
Your water should now be animating!!! Try adding more objects to show off that foam line, and experiment with your WaveSpeed and WaveAmp.
Common Issues
If your water mesh is clipping like this:
.. which mine was, add a little fudge factor to the y-coordinate of your animation. There might be a more professional way to solve this issue, but I’m not sure what it is!
Here’s what that fudge factor looks like. _ExtraHeight is a float defined in Properties{}:
output.pos.y += sin(_Time*_WaveSpeed*noiseSample)*_WaveAmp + _ExtraHeight;
Fin
WOOHOO!! If you’ve gone through the whole tutorial and made it here, then your output should look something like the header image. You can see that I personally preferred the cel-style foam line for the water. 🙂 For referece’s sake, I’ve included the entire shader code below.
–> Link to final code for Unity Water Shader
If y’all have any questions about writing shaders in Unity, I’m happy to share as much as I know. I’m not an expert, but I’m always willing to help other indie devs 🙂
Good luck,
Lindsey Reid @so_good_lin
PS, here’s the Unity graphics settings for this tutorial.

Can you please make a video I got lost half way through
LikeLike
I don’t have any videos planned for these tutorials, but I’ll let you know if I do post any 🙂
LikeLike
Thank you for the tutorial! I’m a super beginner to shaders. I think I have it working except the water is not transparent at all 😦 Do you have any idea why that may be?
LikeLike
Heya, I think you also DM’d me on Twitter and said you figured it out. Let me know if you still need help!
LikeLike
Hey, I have the same problem as Amber. Could you please tell me how to fix that?
LikeLike
She hasn’t shared her secrets! What’s wrong with yours?
LikeLike
Hi, I am having the same problem can you share how you fixed it?
Thank you
LikeLike
What does your issue look like? 🙂
LikeLike
Hi, there is one thing that i can’t really figure out. I’m fairly new to shaders though, so sorry in advance if I ask about something obvious.
in vertex program:
//convert vert world pos to cameras clip space
output.pos = UnityObjectToClipPos(input.vertex);
//in -> clipped vert pos , out -> text coordinate for doin screenspace mapped texture sample
output.screenPos = ComputeScreenPos(output.pos) –> so, our vertex first got clipped to cameras space and then we got screenspace texture coordinate from it, right? UV coords basicaly?
and then, in fragment progam:
float4 s = UNITY_PROJ_COORD(input.screenPos); –> ok, what happens here? Following Unitys documentation:
“UNITY_PROJ_COORD(a) – given a 4-component vector, return a texture coordinate suitable for projected texture reads. On most platforms this returns the given value directly. ”
So, we gave that unity_proj_coord macro our verts position in screenspace texture coordinates and then what did we receive exactly? I can’t wrap my head around it really 🙂
LikeLike
This is a really good question. I just realized the call to UNITY_PROJ_COORD is a bit of an artifact from trying to get this shader to work, and I should probably remove it from the tutorial XD But it does have one use!
Some platforms seem to have an issue with calling SAMPLE_DEPTH_TEXTURE_PROJ directly from a screen position. If we look at the actual defines for Unity’s built-in shaders, UNITY_PROJ_COORD actually returns the exact same value on the majority of platforms:
#if defined(SHADER_API_PSP2)
#define UNITY_BUGGY_TEX2DPROJ4
#define UNITY_PROJ_COORD(a) (a).xyw
#else
#define UNITY_PROJ_COORD(a) a
#endif
This isn’t just the PSP2, but for, it seems like, a few different platforms with a similar issue.
For better reference on any of Unity’s helper functions like this, I highly recommend downloading the built-in shaders (https://unity3d.com/get-unity/download/archive) and looking at what they’re actually defined as in code 😀
LikeLike
Cool, I’ll check them out. Thank you very much for your response! 🙂
LikeLike
Could a PBR lighting model pass be applied to the shader (such as the one in the standard surface shader) to create a more realistic art style for the water?
By the way great work! I just discovered your site it’s awesome!
LikeLike
Glad you’re enjoying it ^^ you should be able to use any kind of other lighting systems in addition to the depth effect!
LikeLike
The camera script has compile errors in unity 2017.3
Error CS0411: The type arguments for method ‘UnityEngine.Component.GetComponent()’ cannot be inferred from the usage. Try specifying the type arguments explicitly. (CS0411) (Assembly-CSharp)
LikeLike
Whoops, yeah that won’t work in any version of Unity, LOL. It’s a typo, I updated the post to fix it. Thank you!
LikeLike
Hey, can you explain why in vert()
tex2Dlod is used instead of tex2D ? You don’t provide any level of detail to tex2Dlod
LikeLike
You are correct that we don’t have to supply a LOD for this texture fetch. However, for reasons I don’t completely understand, using the basic tex2d() function doesn’t work in these vertex shaders.
Here’s the best explanation I could find, from https://gamedev.stackexchange.com/questions/114851/why-cant-i-sample-a-texture-in-a-vertex-shader :
“tex2D() is really a shortcut that says ‘figure out the right mip level to sample automatically’ – in a fragment shader this is done using implicit derivatives, but those aren’t available at the vertex stage”
LikeLike
Firstly, thank you for this tutorial, it’s fantastic! Would you mind posting the values of the depth factor, wave speed and wave amplitude that you used to create the gifs? I can’t seem to find the right numbers to make it look similar.
LikeLike
Heya, I’m going to release the entire Unity project (with the materials and tuned values in a scene!) when I open my Patreon later this week. Just keep fiddling with them! 🙂
LikeLike
Hello Lindsey! First off, I would like to thank you for sharing this tutorial with everybody, for a student this is gold 🙂
Anyway, I am a modeler so I have little understanding of coding, and also I am relatively new to Unity, so what I am about to ask may sound stupid.
I created and attached the script for the camera. Then I created a “Standard Surface Shader” filling the text as written in the tutorial to sample the depth value of the vertexes to obtain an output test color.
I built the code and everything was fine except for two “errors”:
________
1. ‘frag’: function must return a value
Compiling Vertex program
Platform defines: UNITY_ENABLE_REFLECTION_BUFFERS UNITY_USE_DITHER_MASK_FOR_ALPHABLENDED_SHADOWS UNITY_PBS_USE_BRDF1 UNITY_SPECCUBE_BOX_PROJECTION UNITY_SPECCUBE_BLENDING UNITY_ENABLE_DETAIL_NORMALMAP SHADER_API_DESKTOP UNITY_COLORSPACE_GAMMA UNITY_LIGHT_PROBE_PROXY_VOLUME UNITY_LIGHTMAP_FULL_HDR
2. undeclared identifier ‘foamline’
Compiling Vertex program
Platform defines: UNITY_ENABLE_REFLECTION_BUFFERS UNITY_USE_DITHER_MASK_FOR_ALPHABLENDED_SHADOWS UNITY_PBS_USE_BRDF1 UNITY_SPECCUBE_BOX_PROJECTION UNITY_SPECCUBE_BLENDING UNITY_ENABLE_DETAIL_NORMALMAP SHADER_API_DESKTOP UNITY_COLORSPACE_GAMMA UNITY_LIGHT_PROBE_PROXY_VOLUME UNITY_LIGHTMAP_FULL_HDR
__________
Furthermore, by applying the shader to a standard material it just turns purple.
I beg pardon for the wall of text, and totally understand if you’d rather not waste time on it.
LikeLiked by 1 person
Hello!! I’m glad you’re finding them useful. Can you show me what your full code looks like, maybe by pasting it in Pastebin, or DM’ing me on Twitter? And have you compared your code to the final code on the GitHub repo: https://github.com/thelindseyreid/Unity-Shader-Tutorials/blob/master/Assets/Materials/Shaders/water.shader
LikeLike
I found the problem whilst looking into it myself. It’s suppose to be ‘return foamLine’ not ‘return foamline’. I hope this helps. I am creating my own water shader for a uni project so thank you for your tutorials. They are a massive help in my research.
LikeLike
Ah, thank you for the typo correction!
LikeLike
Good evening, thank you so much for all your tutorials! I’m completely new in shaders and that’s very handy to understand it through your explanations!
I’ve got some problems just before the step “adding a ramp texture”. I can see my models (I use for example a cube with the default Material and it casts and receives shadows and the free Horse model on the Asset Store) through the water but the texture of each model are not visible anymore. It’s like only the color set for “Edge Color” is visible on each model (I use 0.1 as a Depth Factor value). I also checked every point of your list of common issues but everything is ok…
LikeLike
Yo, I’m so sorry for the late reply, I went on a hiatus with keeping up with this blog 🙂 please let me know if you still need help!
LikeLike
Hi, amazing tutorial! I’m so glad I found it! I have a few questions about it.
Where you’ve written:
float4 depthSample = SAMPLE_DEPTH_TEXTURE_PROJ(_CameraDepthTexture, input.screenPos);
float depth = LinearEyeDepth(depthSample).r;
I understand that depthSample is the actual value from the depth map, so then what exactly does LinearEyeDepth do to it, and why do we need that value?
My second question comes from this piece:
float foamLine = 1 – saturate(_DepthFactor * (depth – input.screenPos.w));
My question pertains to input.screenPos.w. What is this value, exactly? Is it the distance from the camera to a vertex on the water object? Unity’s documentation says that ComputeScreenPos() calculates a texture coordinate, so what does the w value represent?
Thank you for the tutorial, and thank you for your help!
LikeLike
Yo! I went on hiatus with maintaining this blog; please let me know if you still need help!! Sorry for the slow reply!!
LikeLike
Hi Lindsey! Thanks for the great tutorial! This was my first go at creating a depth texture and it feels pretty powerful already.
Question: This tutorial is written for a perspective camera. Have you tried to get this effect working on an orthographic one? I’m trying but having some difficulty. I removed the `linearEyeDepth` call since in an orthographic perspective we already have it. The part that I can’t figure it out is how to correctly calculate `foamLine`. It looks like there’s some kind of transformation missing on `input.screenPos.w`. Whatever `_DepthFactor` I use I still get a `foamLine` of 1 (when there’s a non-zero `depth`). Any ideas? Thanks in advance!
LikeLike
You DM’d me on Twitter with the same question, so let me know if you still need help! For anybody reading this- I don’t think this will work with an orthographic perspective, since orthographic cameras don’t render depth the same way.
LikeLike
Hello I am the one who is studying shader in Korea! I tried to implement your water and ice shaders while searching for shader-related information.
If the camera is orthographic when it implements a water shader, how does it work differently?
And I’ve implemented the same code for the ice shader, but it’s not like ice.
I do not have a place to put a Bump Ramp in the tutorial, but I guess that’s the difference. What should I put in?
LikeLike
It works very differently, and I haven’t experimented with that yet! The way you calculate depth will be different, so I would start with that.
LikeLike
Hi! Wonderful tutorial, the water looks great and helps a designer like me understand behind the scenes with the intricacies of programming. But I was just wondering: would it be possible to curve the ‘foam lines’ when the edges collide with things like corners?
LikeLike
Can you be more specific about what defines a ‘corner’ and how a curve would work? Keep in mind that you’ll have to write rules for the shader even clearer than you can define them to me 😉
LikeLike
Hey Lindsey, thank you very much for sharing your knowledge ! One can learn a lot and good tutorials on shaders are really rare. I am a complete beginner with this but I tried to recreate a modified version of your water shader with a surface shader. Is there a disatvantage with using surface shaders for this kind of task ?
Here is what I came up with, in case it could be interesting
https://github.com/Luukezor/unity-shader-learning/blob/master/Shaders/S_WaterSimpleSurface.shader
LikeLike
TBH, I didn’t even know you could use vertex shaders with surface shaders in Unity, as I rarely use them XD
LikeLike
Hello Lindsey, thanks for the tutorial. I tried to discover how to make the fog affect the water, but with zero success. Could you please help me here?
LikeLike
Hey thanks for sharing this, it looks amazing but for some reason it doesnt looks the way i want…
i’m testing this with some primitive cubes and default materials of unity, the shadder itself is on a simple plane with some cubes inside of it.
Please can you help me?I just Uploaded a short video to see how it looks on my pc:
https://drive.google.com/open?id=1ZWupWxDSyVDXlGYPtbxedHveptM2v9tz
LikeLike
Keep fiddling with those speed & amp values, and press ‘play’ to actually see the waves animate!
LikeLike
I have tried this multiple times. Following your instructions & settings and even just cutting and pasting the code (to ensure I didn’t make any mistakes).
But still, the shader is just white for me, it’s just a big white plane ….
Any ideas?
LikeLike
ok, I have it working.. I used “Linear01Depth” instead of “LinearEyeDepth”
LikeLike
Hi Lindsey!
Thank you so much for this amazing tutorial. I did have one question though. I couldn’t seem to figure it out. For some reason when I use LinearEyeDepth() to retrieve the depth value it doesn’t work for me. However, I got it working by substitute the function with Linear01Depth(). Do you know what possibly be the cause of it? No one else on this blog seems to have this issue.
Thank you vert much
LikeLike
Oh never mind! It worked! However, I couldn’t get the black&white intersection visualization working with LinearEyeDepth for some reason.
LikeLike
For me, using Unity 2018.3 it doesn’t work and looks just like in Daniel Queiroz’video. 😦
What version of Unity did this last work in?
LikeLike
Hello! I just found this tutorial, so I don’t know if you’ll see this, but first off thanks for making it! I’m just getting into Unity and shaders, so it’s fantastic to have resources to check out!
I’ve tried following a couple of your shader tutorials, and combining them together – specifically this, your ice distortion, and your simple cel shader. I finally (sort of) got the distortion effect working with the water shader, then added the outline. But I’m having trouble getting the shader to receive shadows. I’ve tried googling it, but most of the answers fly over my head. One solution people suggested was a line at the end,
Fallback “Diffuse”
or another shader, so it would go to that for the shadow passes, but that didn’t help. The cel shader can cast and receive, but when I take the same shadow pass onto the water shader it can cast (I think) but not receive.
I realize you can’t help without seeing the code, so if you do see this what’s the best way of showing you?
LikeLike
Hi Lin! I just discovered your great tutorials and hope to do all of them this year.
But I have a problem just at the beginning after the first shader that should render the depth as grayscale.. in my case the plane is just white all the time. screenshot: https://prnt.sc/qtkjkl
I’m using Unity 2019.2 on Windows, and I configured unity like you described in a separate post.
I’m very new to shader programming and have no idea what I can do now^^
What version of unity would you recommend?
Thanks!:)
LikeLike
Hey Arthuro, I’ve got the same problem too.
The problem is you’re probably too far away from the water plane. After applying LinearEyeDepth, the depth represents the actual depth in view space, which is easily greater than 1, thus making a white plane. If you pull the camera really close then you’ll start to see the grey.
LikeLike
For some reason mine just shows white no matter how close i get! 😦
LikeLike
Awesome tutorial Linden! Really got me started to learn about shaders.
For those interested in the (depth – input.screenPos.w) part, after some digging on the Internet, I’ve decode this shader magic. Basically, after we transformed into clip space, the w component now stores the original z component in view space, which represents its depth (distance) to the camera. The variable “depth” is the depth of whatever already rendered below the water plane, so subtracting the two gives us how deep the object is below the water (measured from the camera).
The shallower the object is underwater, the larger foamLine will be, making the final color closer to the foam color! Hope this helps to clear up that part of the code!
LikeLike
Thank you for the patient tutorial! I got the codings from your hub. Actually it does work and the effect feels great, but then I notice that there is a camera shadow casting on the water surface. It kinda wierd but I don’t know what to check.
LikeLike